How To Invite An Agency To Your Meta Business Account
About to start working with a partner (i.e., agency, freelancer, etc) on your Meta Ads?
Well, you’ve come to the right place.
Trust me when I say we’ve seen it all, from agencies that set up pixels, ad accounts, and everything in between under their own ownership.
On our services side, we are always adamant about getting the setup right for the business. Even with ScaleMath, partnerships aren’t always forever, and even if they are – ad accounts and data should always belong to the company.
So, if you work with an agency that tries any of the following – run for the hills:
- Run billing through them (i.e., they pay for ads and bill you)
- Set up a new account or use another ad account to run ads (yes, this can mean they still use your existing Facebook page to run ads, but the data would all belong to their Meta Business profile, not yours).
It may sound like I’m overstating the risks here, but I’ve personally advised startups (as well as companies we’ve operated through ScaleMath) that have been burned by some very “well-renowned” ad agencies that still do this sort of thing. How they get away with it is completely beyond me because it is incredibly unethical.
So, disclaimers and warnings aside – this right here is how you should be granting partners (ad agencies, freelancers, or any third party) access to your ads account:
Head to the Meta Business manager: https://business.facebook.com
Toggle the account switcher and select the settings (gear) icon as shown below:

Once in settings, head to the Users > Partners area:
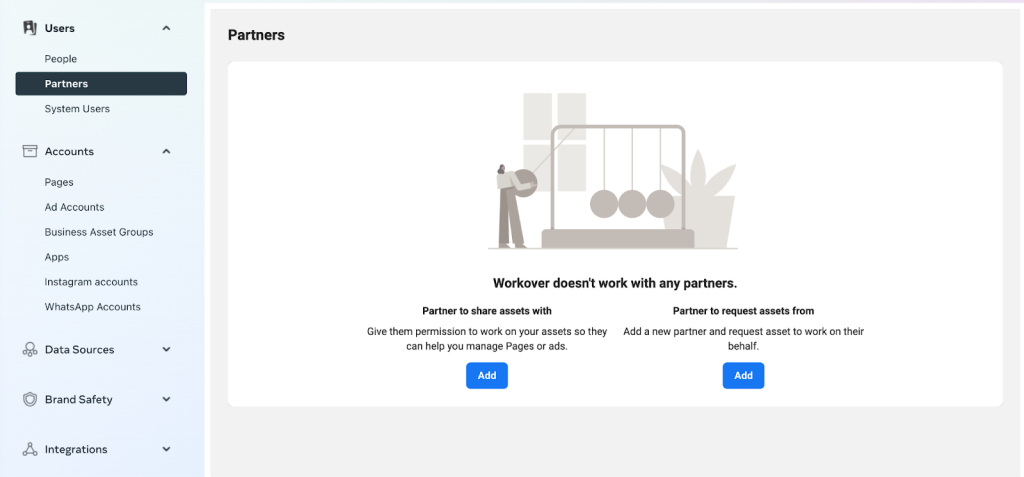
In this example, this account does not yet have any partners connected to the account. As such, simply hit Add under Partner to share assets with.
If you already have a partner linked (this can include software for the purpose of management/pulling out reporting data), it may look something like this:
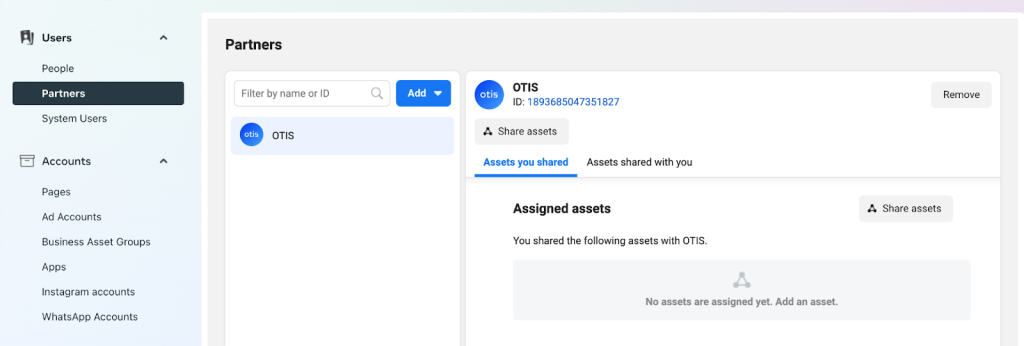
In this case, the add button would appear at the top of the list of accounts.
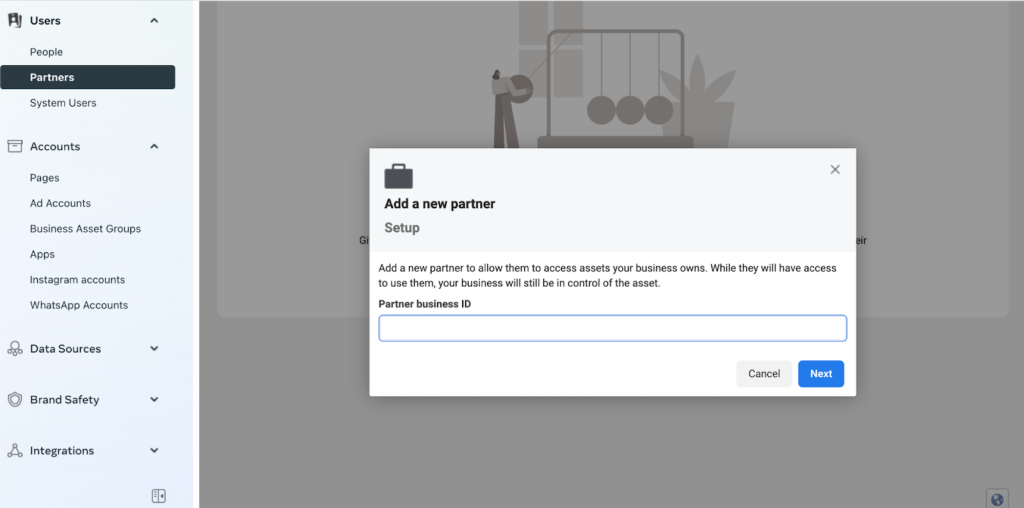
Once clicked, you will be prompted to enter the business ID of the partner you are looking to invite. After hitting next, you’ll be given the option to control permissions.
These are, in our view, the required permissions a partner should have:
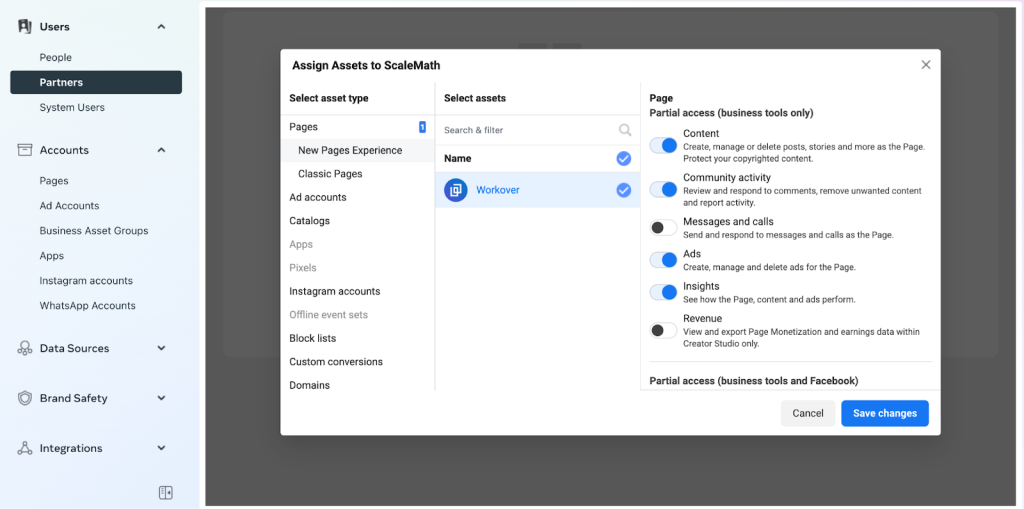
Beyond that, we also control permissions on our end based on need-to-access for everyone. Then, switch to Instagram tab:
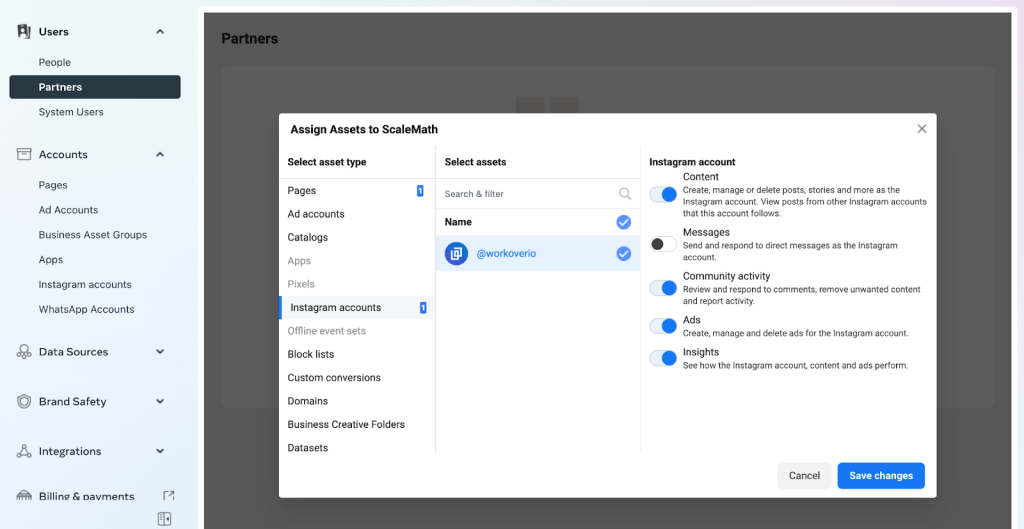
And then hit Save changes.
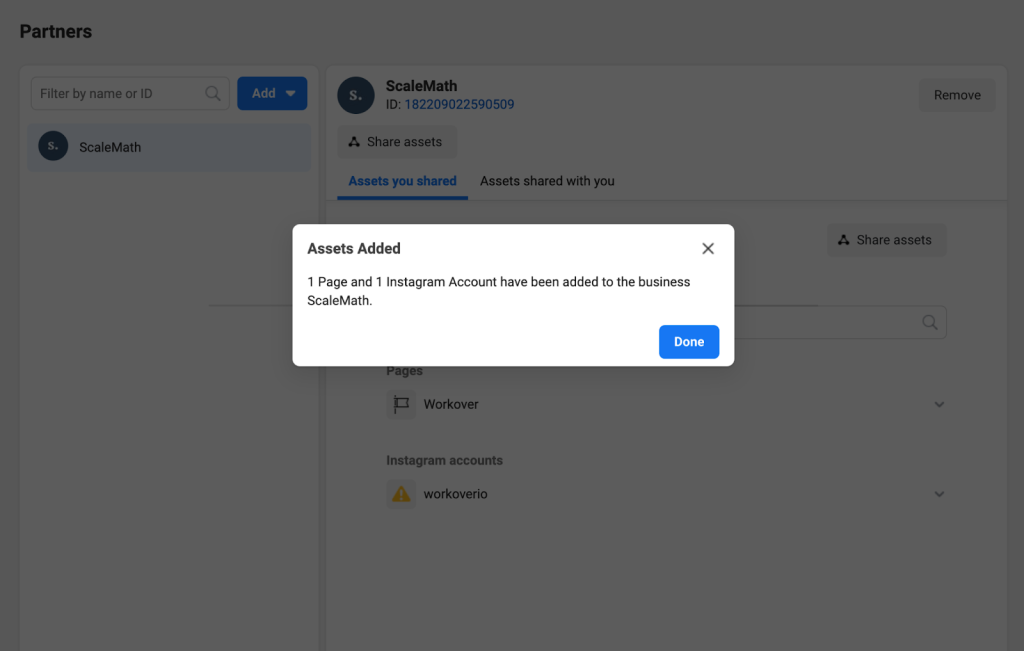
And that’s it, all done!
👋 Looking for input from a team that’s worked with category-leading companies – possibly like yours? We’re here and always happy to help! Use the contact widget in the bottom right-hand corner to get in touch or apply to work with us here.